
Install Mili on Windows, macOS or Linux
From the download page to your first secure sign-in — a single guided command, on hardware you own.
Mili installs with one command. The installer checks your machine, sets up its own container engine, downloads the Mili engine and starts it — no specialist required, and no Docker account.
Everything runs on hardware you own. Model inference is routed to the Mili GenAI gateway; your data, conversations and credentials stay on your machine.
Hardware requirements
Mili is comfortable on modern business hardware. Size the machine generously: the container engine is provisioned a large share of your system resources so the agent has room to work.
| Component | Minimum | Recommended |
|---|---|---|
| Operating system | Windows 10/11 · macOS 13+ · Linux x86-64 · Raspberry Pi 4/5 (64-bit) | — |
| Memory (RAM) | 8 GB | 16 GB or more |
| CPU | 4 cores | 8 cores |
| Free disk | 20 GB | 40 GB or more |
| Network | Outbound HTTPS for the one-time engine download (~1.2 GB) and inference | — |
Ports & network
Mili listens locally on one port and reaches out over HTTPS. No inbound port needs to be opened to the internet for normal use.
| Port | Direction | Purpose |
|---|---|---|
5001 | Inbound (local) | The Mili web app over HTTPS at https://localhost:5001 |
443 | Outbound | Model inference via the Mili GenAI gateway, plus engine download and updates |
8080 | Outbound (optional) | Call-home to a Mili Management Server, if this agent is centrally managed |
Install Mili
Start on the download page — it detects your operating system and shows the exact command to run.
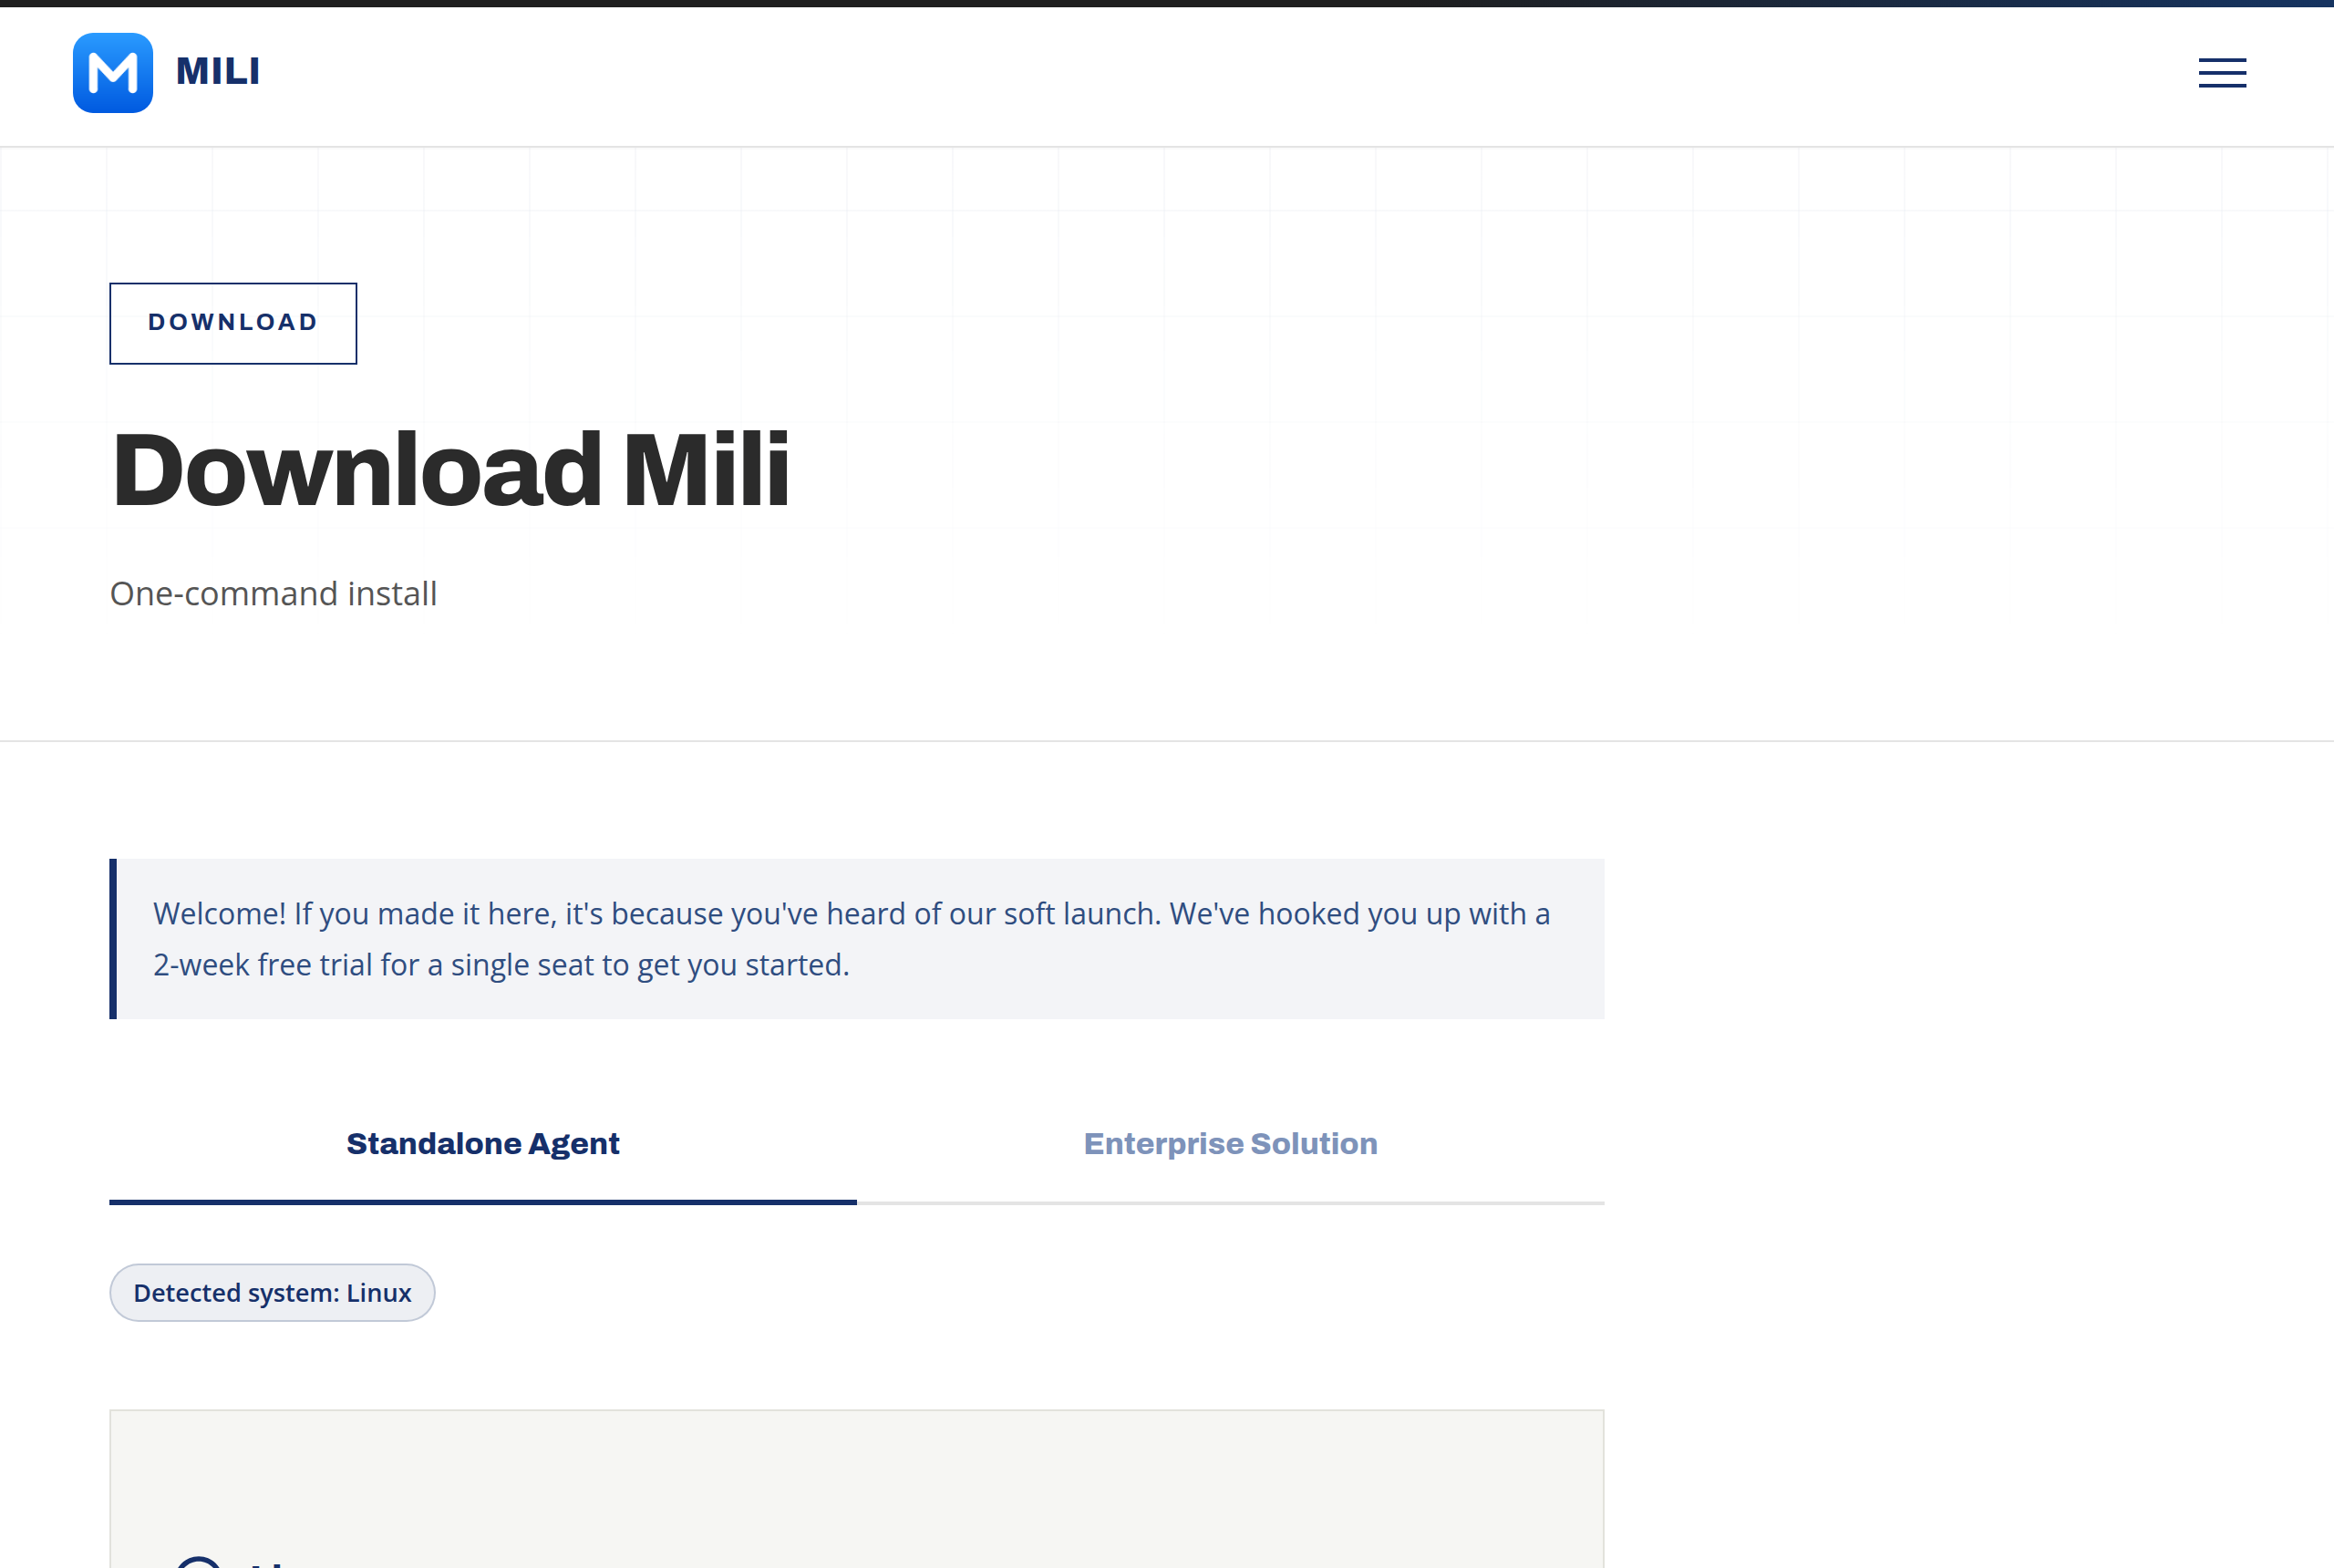
Run the install command
macOS
Open Terminal, paste and press Enter. Do not use sudo on macOS — Mili installs a per-user engine under your home folder.
Installs to /Users/<you>/mili and runs a dedicated Colima profile named mili with its own socket — any existing Docker Desktop or Colima setup is left untouched.
Linux · Raspberry Pi
Open a terminal, paste and press Enter (you’ll be asked for your password).
Installs to /opt/mili and uses the host’s own Docker (installed automatically if absent).
Windows
Click Start, type PowerShell, right-click and choose Run as administrator, then paste and press Enter.
Windows runs the Mili engine inside a dedicated WSL2 distribution named mili-engine — Docker Desktop is not used. If WSL2 isn’t enabled yet, the installer enables it and asks you to restart, then continues automatically.
First sign-in
When the installer finishes, open Mili in your browser: https://localhost:5001
NET::ERR_CERT_AUTHORITY_INVALID). This is expected — Mili secures the connection with a certificate it created on your own machine. Because the address is your own computer, it’s safe to continue: click Advanced → Proceed to localhost.Create your administrator account
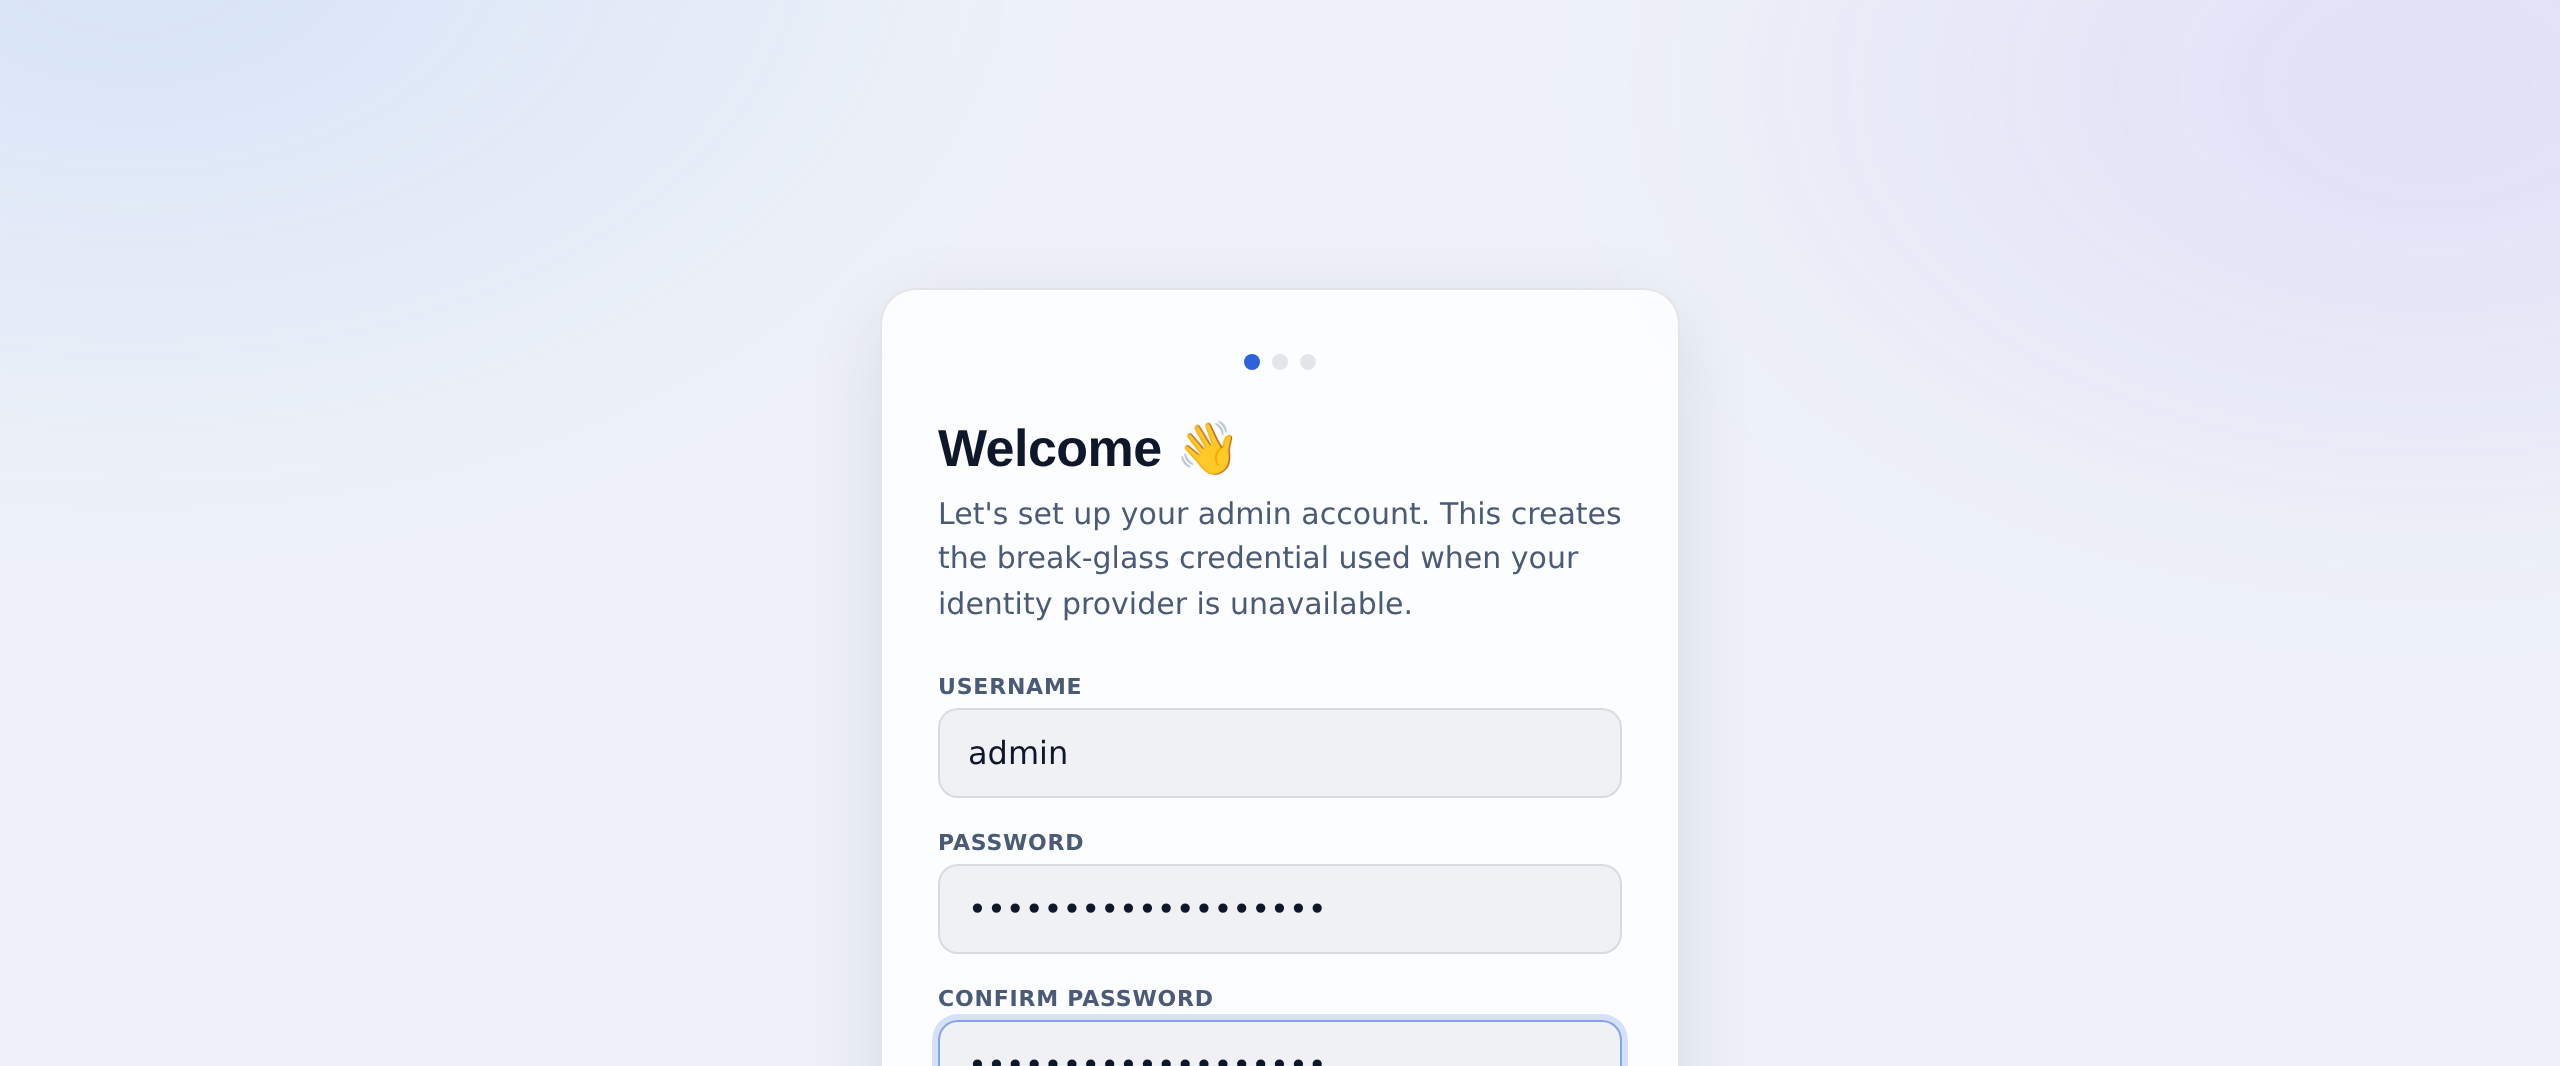
On first launch, Mili opens a short setup wizard. Set a username (default admin) and a strong password of at least 12 characters.
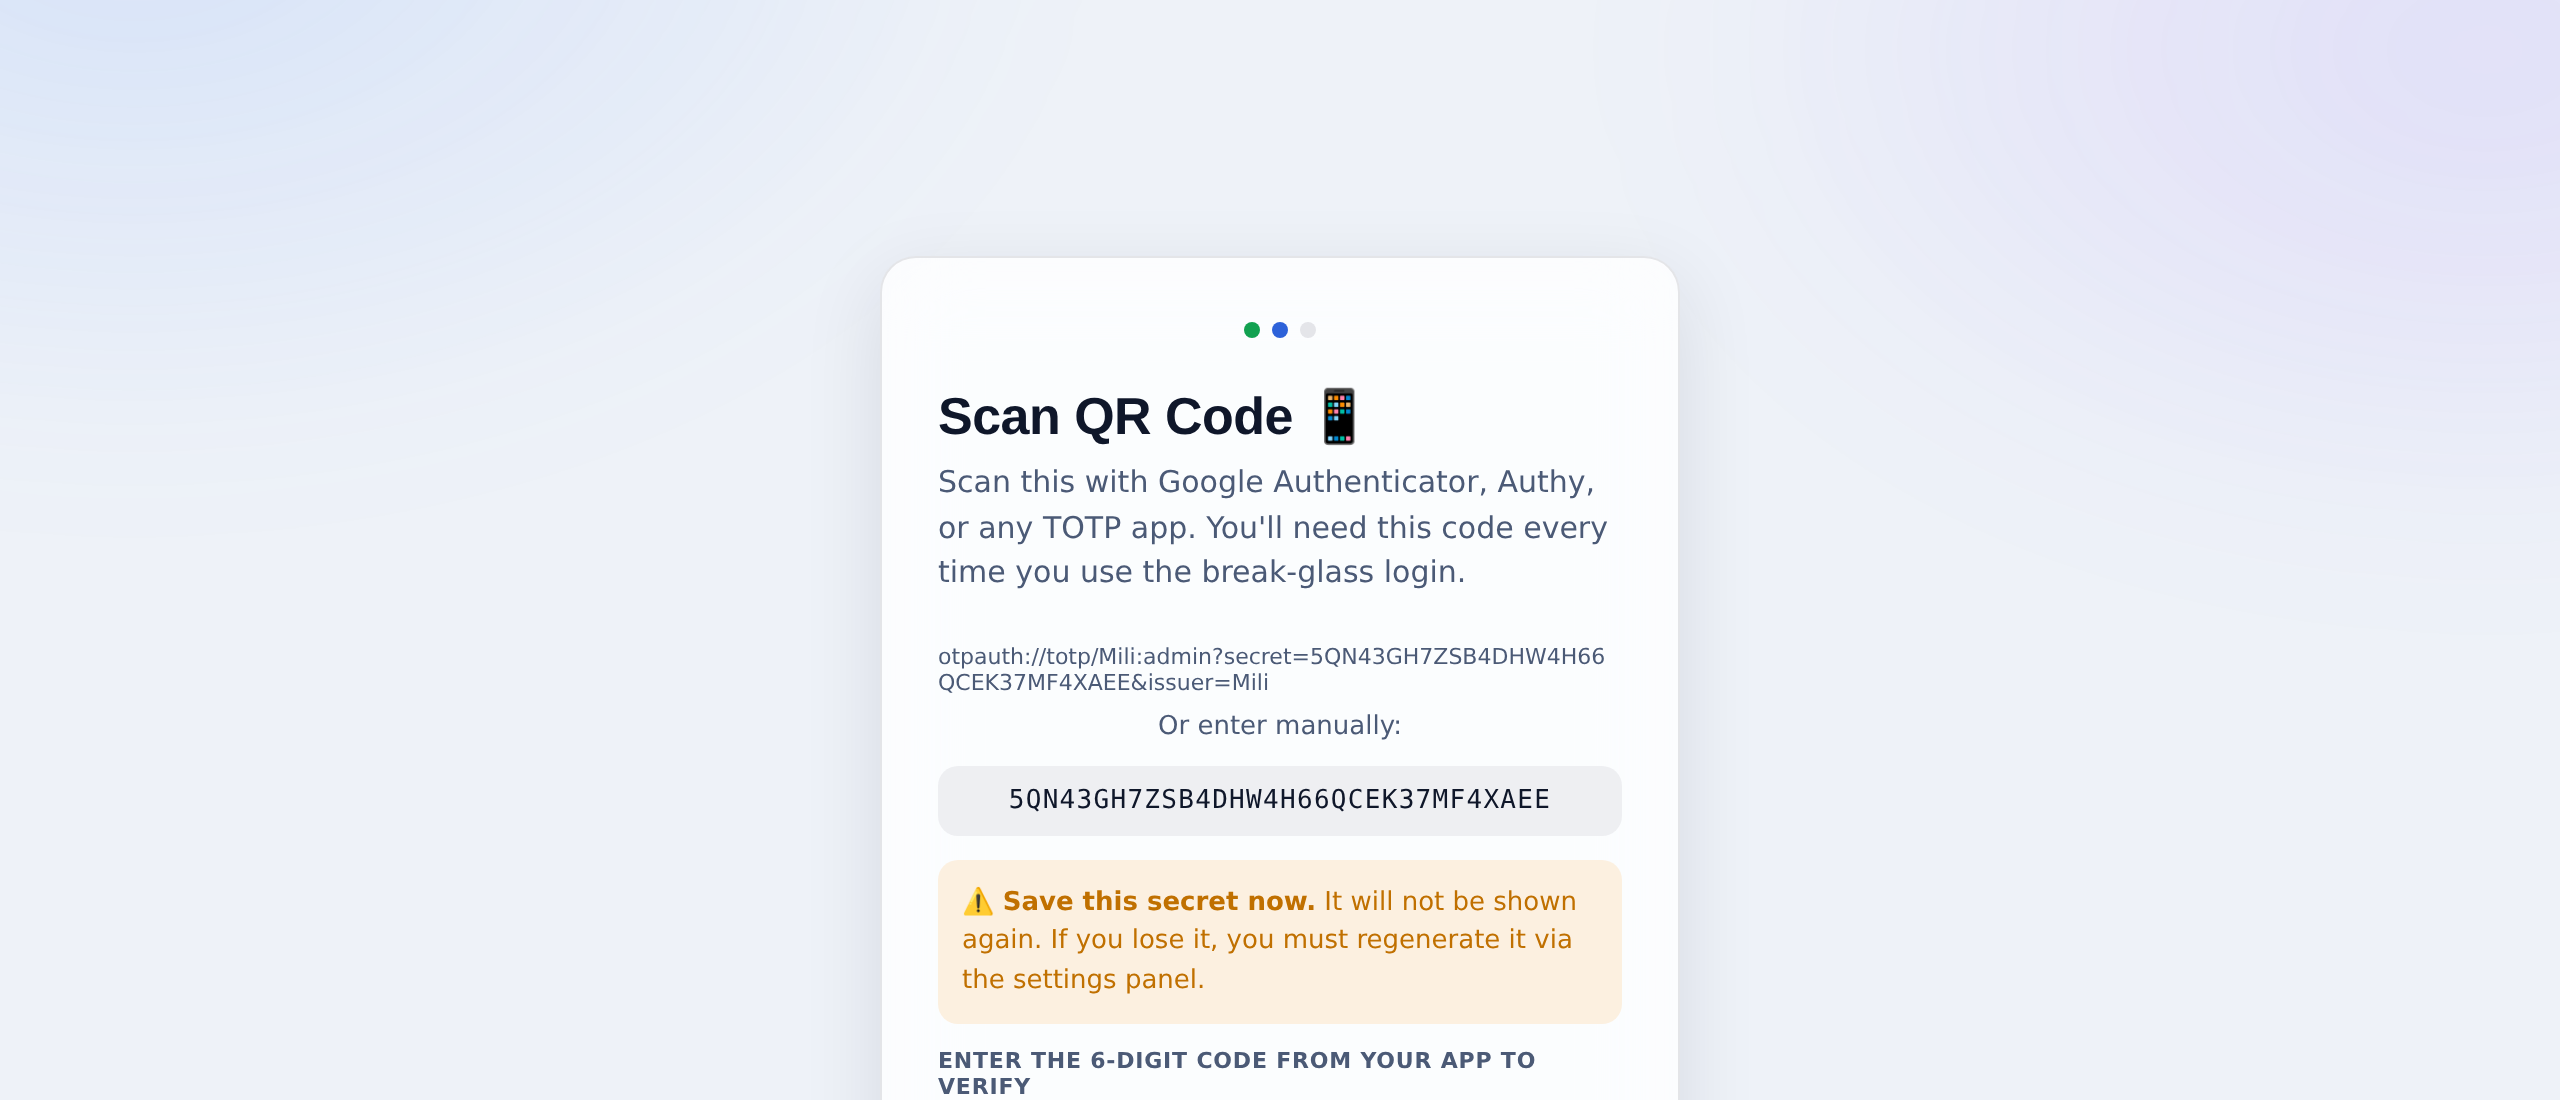
Next, add a second factor: scan the QR code with an authenticator app and enter the 6-digit code to confirm.
admin / password credentials, you’ll be forced to change them on first sign-in.Authentication
Manage credentials any time under Settings → Authentication: change the administrator password and toggle the TOTP second factor.
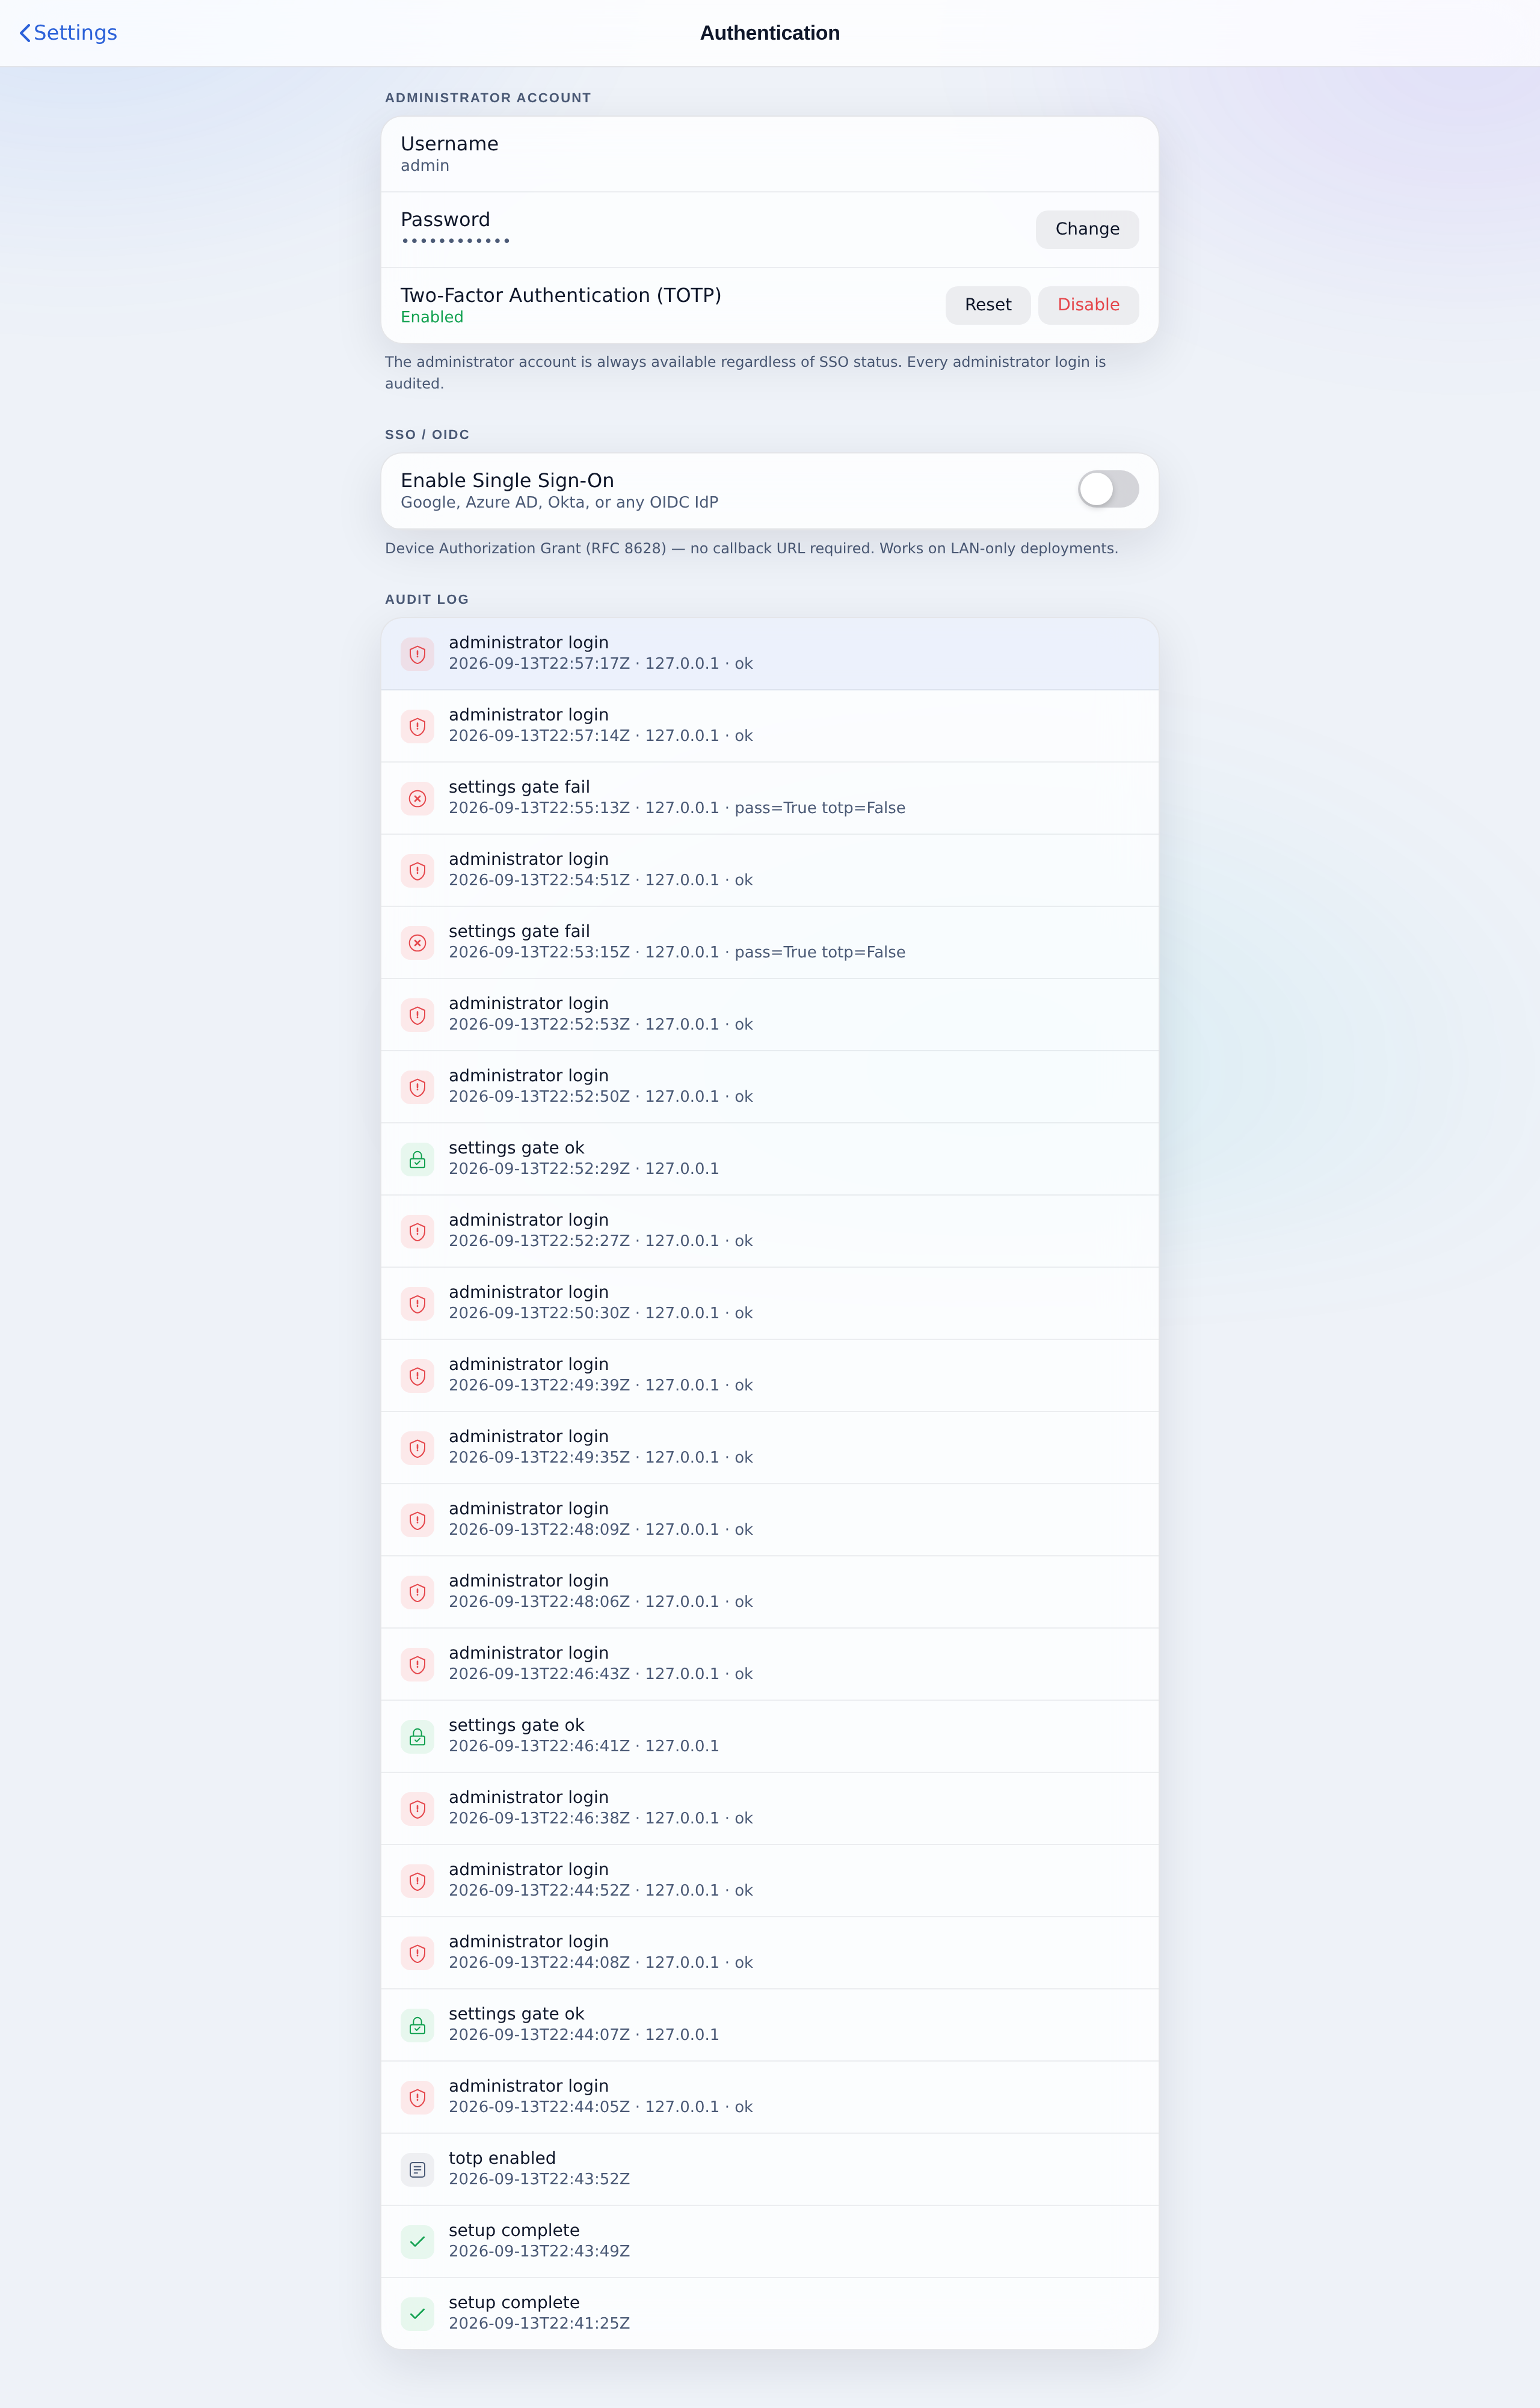
Single sign-on (SSO) Requires Management Server
SSO lets your team sign in with Google Workspace, Microsoft Entra (Azure AD), Okta or a generic OIDC provider. Sign-in is brokered securely by your Management Server, so SSO requires the Mili Management Server and an active call-home connection. Without it, use the local administrator account.
SSL / TLS certificate
At install time Mili generates a self-signed certificate on your machine (valid 825 days). To remove the browser warning on a named host, upload your own certificate under Settings → SSL.
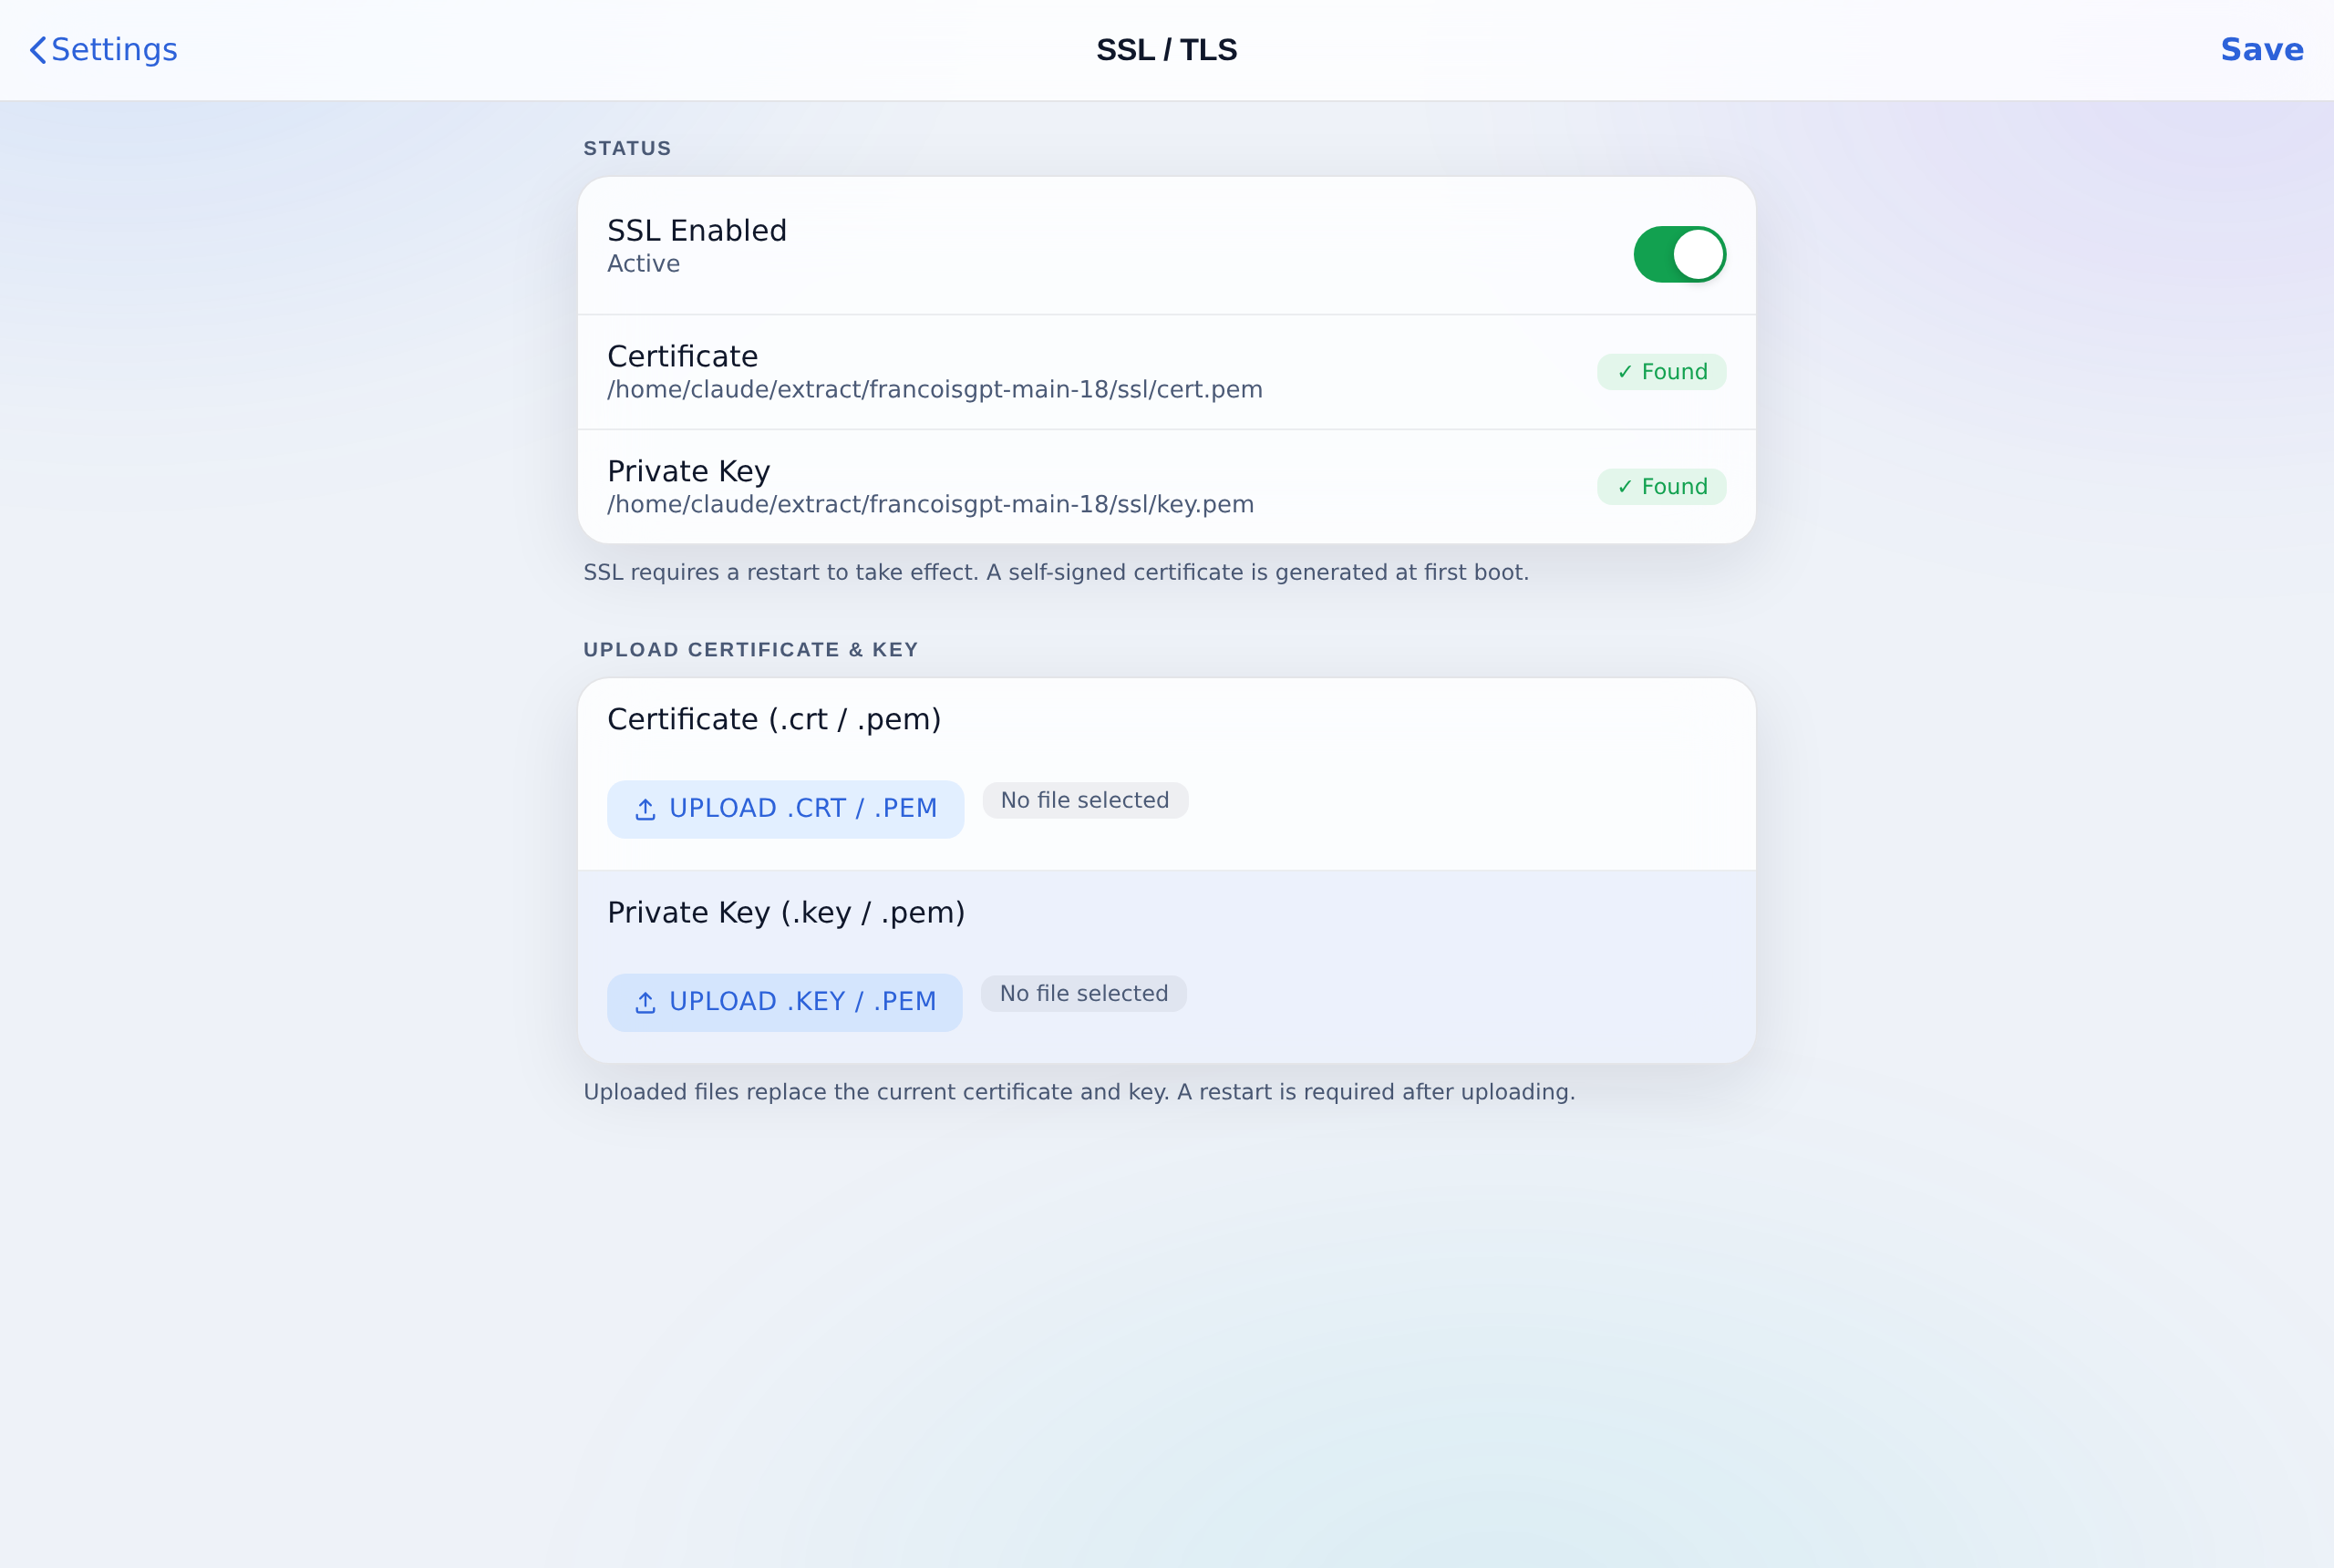
.crt/.pem) and private key (.key/.pem) are validated as a matching pair before going live. A mismatched pair is rejected and the current certificate is kept, so a bad upload can never take Mili offline.Connect to a Management Server (optional)
If your organization runs a Mili Management Server, connect this agent to it under Settings → Call Home for central management and to unlock fleet features such as SSO, inbound MCP OAuth and team chat bots.
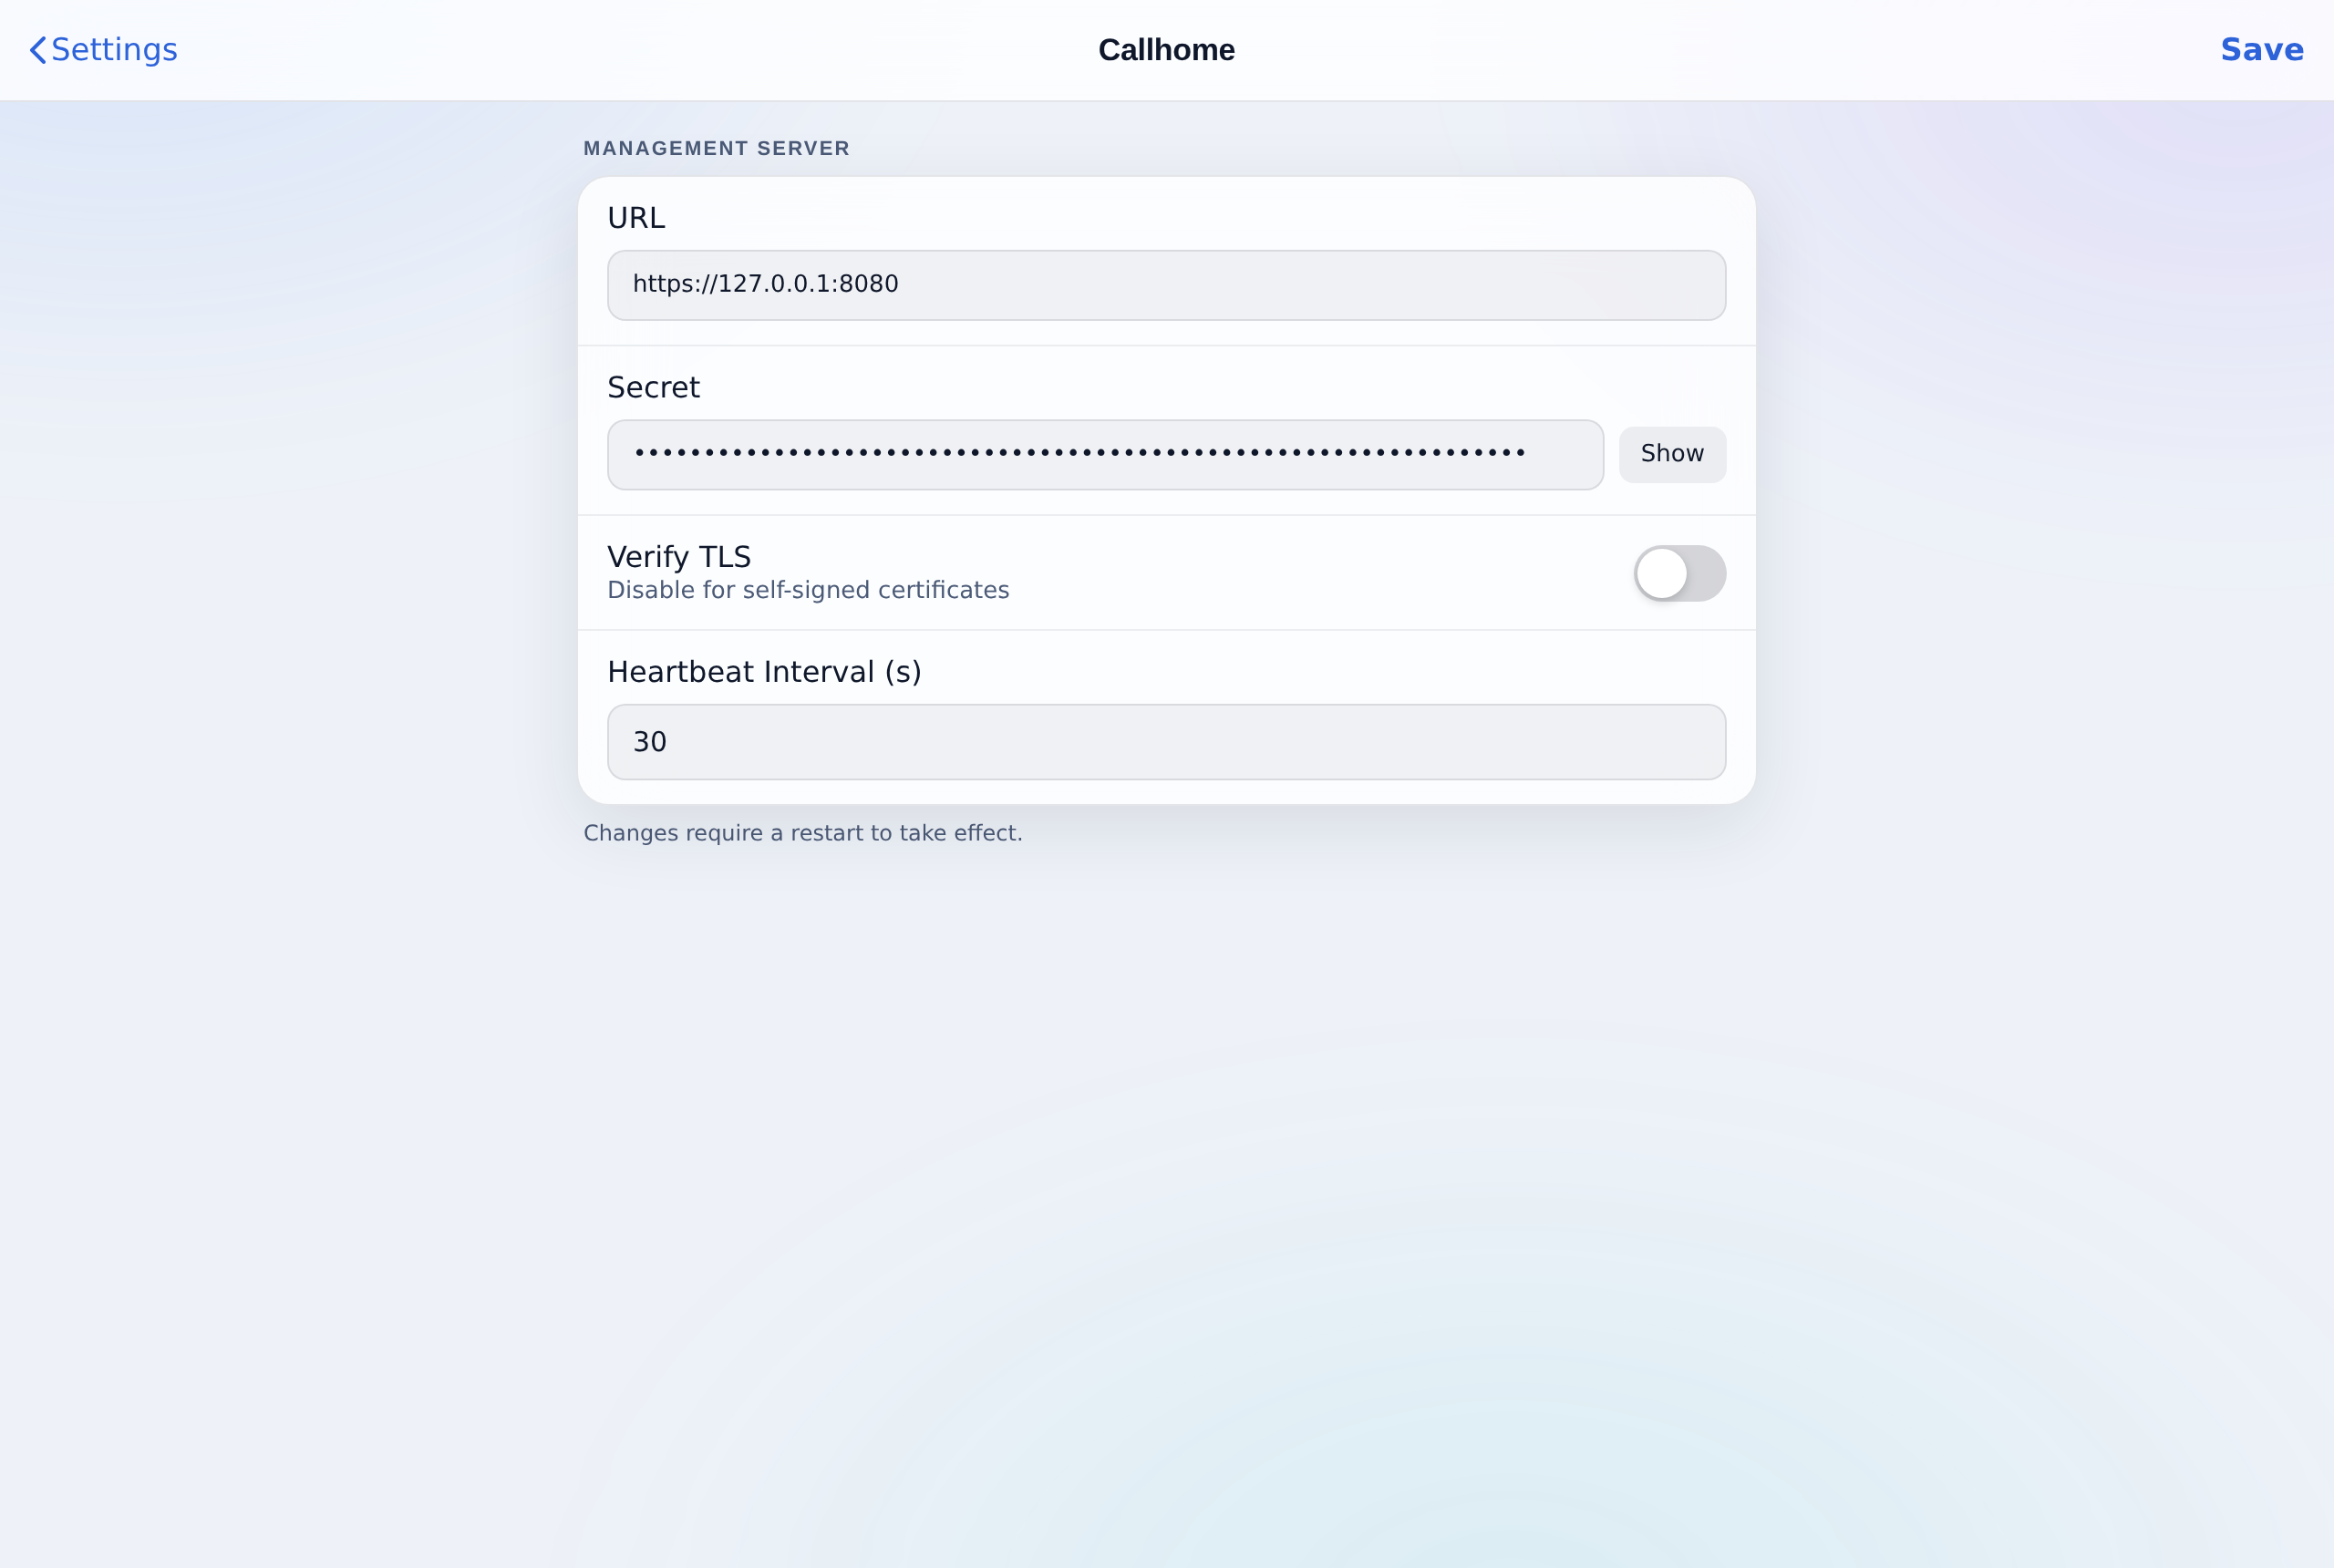
You need two things from whoever runs the server: the server URL (for example https://mgmt.example.com:8080) and the shared secret — the MGMT_SECRET printed when the server was installed. Paste both, set an interval (30 seconds is typical) and save.
If something doesn’t go to plan
| What you see | What to do |
|---|---|
| “Your connection isn’t private” at localhost | Expected. Click Advanced → Proceed to localhost. |
localhost:5001 won’t load | Give the engine a minute to finish starting, then refresh. On macOS check ~/mili/bin/mili-engine.sh status. |
| macOS: “do NOT run with sudo” | Re-run the command without sudo. |
| Windows: install fails early | In an admin PowerShell run wsl --install, restart, then run the install command again. |
Where your data lives
Mili stores everything in its install folder (/opt/mili on Linux, ~/mili on macOS, inside the mili-engine distro on Windows) and in Docker volumes. Nothing is shared with an outside tenant, and every credential is encrypted at rest.